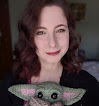
This week I'm giving you guys a pattern for Growlithe! This tiny, adorable little Pokemon would look perfect sitting on your desk or shelf, and is incredibly easy to make to boot!
For this one, you'll have to be at least mildly comfortable with embroidery, as the stripes are embroidered on. Additionally, get ready to be patient. The fur takes forever to attach on.
It's all worth it though. Once you're done you're left with a cute, fluffy friend. :D

1
For this one, you'll have to be at least mildly comfortable with embroidery, as the stripes are embroidered on. Additionally, get ready to be patient. The fur takes forever to attach on.
It's all worth it though. Once you're done you're left with a cute, fluffy friend. :D

These patterns take time to design and write out. If you enjoyed using my pattern, please consider supporting me by paying what you can for the pattern by using the "buy me a coffee" button to the right.
Growlithe Pattern
Materials:
3.25mm crochet hook
1 ball orange worsted weight yarn
Small amount of black and white/cream worsted weight yarn
1 ball of white or cream roving yarn (or any yarn you can brush out easily)
Polyester stuffing
Tapestry Needle
Scissors
8mm safety eyes
Abbreviations
SC = single crochet
DEC = decrease
INC = increase
FO = Fasten off
slst = slip stitch
X = stitch
Head
Row 1: Make a magic loop and SC 8 into it (8)
Row 2: INC x 8 (16)
Row 3: *SC, INC* x 8 (24)
Row 4-6: SC x 24 (24)
Row 7: SC 7, INC, SC 8, INC, SC 7 (26)
Row 8: SC x 26
Now you're going to place the safety eyes in-between rows 6-7 in between the two increases. Count in 2 from each of the increases, and place the eyes there.
For example: INC X EYE X X X X EYE X INC
Row 9: SC 2, DEC 11, SC 2 (15)
Stuff Head
Row 10: SC, DEC 6, SC 2 (9)
Body
Continuing from head
Row 11: INC 3, SC 5, INC 2 (15)
Row 12: INC 2, SC 12, INC (19)
Row 13-16: SC x 19 (19)
Row 17-Close: DEC to close, FO with slst
Nose
Row 1: Make a magic loop, and SC 6 into it (6)
Row 2: INC 3, SC 3, FO with slst (9)
Legs/Arms
Row 1: Make a magic loop, and SC 8 into it (8)
Row 2: SC 8 (8)
Row 3: DEC 3, SC 2 (5)
Row 4-5: SC 5, FO with slst (5)
The decrease shaping will create a paw shape.
Ears:
Row 1: Make a magic loop, and SC 6 into it (6)
Row 2: INC 4, SC 2, FO with slst (10)
Sew arms/legs, nose, and ears onto the body.
Tail:
You're going to make a base for the tail, so you don't have to use roving for all of it.
Row 1: Make a magic loop, and SC 6 into it (6)
Row 2: INC 3, SC 3 (9)
Row 3: DEC 6, SC 3 (6)
Row 4-5: SC (6)
Row 7-Close: DEC to close, FO with slst
Sew the tail onto the body.
Now for the fun part - the fluff!
You can either attach it this way: https://freshstitches.com/how-to-add-yarn-hair-to-amigurumi-tutorial/ , and brush out the yarn to be fluffy
OR you can do it the lazy way like I did:
Using a hot glue gun, pinch small pieces of the roving, and stick them where they're supposed to be. It works, and it's quick! You just have to be careful with the glue, as it can look very messy if done badly.